10 Sump Pump Drainage Tips for Global Buyers
Choosing the right sump pump drainage system can protect buildings, inventory, and customer investments across many climates. Yet drainage conditions vary widely between a coastal warehouse, a basement apartment, and a remote construction site. Heavy rain, freezing soil, unstable power, and limited maintenance access can change the correct solution. Global buyers need more than pump capacity figures. They need a drainage plan that fits the property, local installation practices, and expected water volume.
This guide shares ten practical sump pump drainage tips based on common installation challenges and professional water-management principles. It examines discharge pipe sizing, backup power, check valves, freezing risks, inspection access, and safe outlet placement. Small details matter. A poorly supported pipe may sag and restrict flow. An outlet placed too close to a foundation may return water to the pit. In one real-world situation, a pump worked well during testing but failed after debris blocked the intake screen. That mistake was avoidable.
No drainage system is perfect. Buyers should question impressive specifications and verify performance under realistic conditions. Product documentation, qualified installers, warranty terms, and local building requirements deserve careful review. A pump suitable for a mild climate may struggle in severe winter conditions. Likewise, a low-cost setup may require frequent service. The following tips are designed to support informed purchasing, clearer supplier discussions, and more dependable sump pump drainage decisions worldwide. Check the details twice. Reliability is built gradually.

Understanding Sump Pump Drainage Systems and Their Main Components
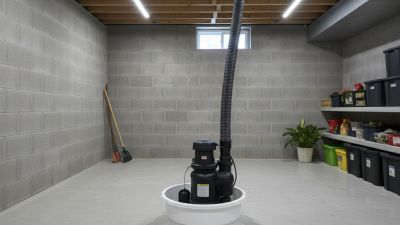
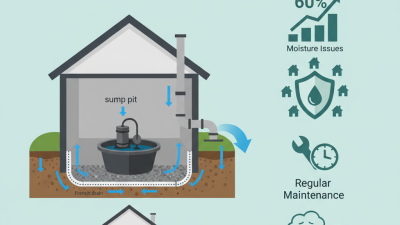
A reliable sump pump drainage system starts with the basin, not the pump. The basin collects groundwater through perimeter drains or wall openings. A float switch then activates the motor when water rises. Discharge piping carries water outdoors through a check valve, which limits backflow. The final outlet should release water away from the foundation, without disturbing neighboring property.
Hydraulic Institute pump guidance stresses reading performance at total dynamic head, not maximum advertised flow. A pump moving 40 gallons per minute at low head may deliver far less through a long, narrow pipe. FEMA’s 2023 National Risk Index also identifies flooding as a widespread recurring hazard across U.S. communities. For global buyers, voltage, frequency, pipe diameter, backup power, and local discharge rules require careful checking. Field inspections often find a good pump weakened by poor routing. That is frustrating, but preventable.
Tips: Measure basin depth, pipe length, elbows, and elevation before selecting capacity. Keep the discharge line short and protected from freezing. Test the float monthly with clean water. Add a high-water alarm and a backup pump where outages are common. The U.S. Army Corps of Engineers emphasizes design head, flow demand, and redundancy in pumping-station planning. A battery backup is useful, but it is not unlimited. Its runtime needs a realistic outage estimate.
Choosing Suitable Drainage Routes for Different Property Types
A sump pump route should match the property, soil, climate, and local drainage rules. For a detached home, discharge water several metres from the foundation. Use a sloped pipe when gravity can carry water safely. Keep the outlet away from doors, walkways, wells, and neighbouring properties.
Townhouses and compact urban homes often have limited outdoor space. A permitted stormwater connection may be suitable, but confirm approval before installation. If the route crosses shared areas, document access and maintenance responsibilities. Backwater protection can reduce the risk of contaminated water returning during heavy rain.
Rural properties may use a dry well, drainage field, or daylight outlet. Soil testing matters. Clay soil can absorb water slowly, while sandy soil may drain too quickly toward vulnerable groundwater. On sloped land, secure the pipe and protect the outlet from erosion. Cold regions need insulated or buried discharge lines to prevent ice blockage.
Basements in commercial buildings usually require larger capacity and backup planning. Multiple pumps, high-level alarms, and separate discharge routes can limit flood damage. Every route should remain visible enough for inspection. Hidden pipes look tidy, but they are harder to repair.
A route that looks perfect on paper may fail after one severe storm. I would test the system during wet weather and inspect the outlet afterward. Local standards differ, so a qualified drainage professional should verify gradients, connections, and permits before construction.
Installing Discharge Pipes, Check Valves, and Freeze Protection
10 Sump Pump Drainage Tips for Global Buyers
Installing Discharge Pipes, Check Valves, and Freeze Protection
A reliable sump system starts with a correctly sized discharge pipe. Match the pipe diameter to the pump outlet, unless local engineering guidance requires otherwise. Keep the route short, smooth, and gently sloped away from the foundation. Excessive elbows increase friction and reduce flow. FEMA estimates that one inch of indoor flooding can cause about $25,000 in damage. That figure makes a small drainage mistake expensive. Use local rainfall-frequency data, such as NOAA Atlas 14 in the United States, or equivalent national hydrology reports elsewhere.
Tips: Add a check valve with the flow arrow pointing outward. Install it above the pump outlet, leaving service access. Secure joints against vibration. Discharge water at least several feet from the foundation, subject to local codes. Avoid directing flow toward wells, shared boundaries, or lower buildings. Test the valve by lifting the float and listening for backflow. A silent test is not proof. Observe the pipe.
Freeze protection needs climate-specific planning. Bury exterior piping below the local frost depth where practical. Otherwise, insulate exposed sections and maintain a continuous downward slope. Avoid low pockets, where trapped water can freeze and split the pipe. Heat tracing may help, but it needs approved installation and electrical protection. Keep the outlet clear of snow and ice. In cold regions, a secondary discharge route provides resilience during a blocked winter outlet. Field inspections often find this weakness: the pump works, but frozen water has nowhere to go.
10 Sump Pump Drainage Tips for Global Buyers
Installing discharge pipes, check valves, and freeze protection requires attention to four practical areas. The chart groups ten drainage practices by their primary engineering purpose.
This checklist-based distribution is not a market survey. Pipe diameter, burial depth, fittings, and freeze-protection methods should be confirmed with the pump manufacturer and local plumbing or building requirements.
Managing Water Flow, Local Regulations, and Environmental Requirements
For global buyers, sump pump drainage is not only a capacity question. It is a water-management decision. Start by measuring the basin, discharge distance, pipe height, and expected inflow. A pump that looks powerful may lose performance through long or narrow pipes. Select a backup power option where storms often interrupt electricity. Keep the pump upright and leave enough clearance for inspection. A simple alarm can warn about rising water before flooding spreads.
Discharge water away from foundations, entrances, wells, and neighboring properties. Confirm whether local rules permit release into a storm drain, surface channel, or approved soakaway. Requirements differ between cities and countries. Some areas require permits, air gaps, backflow protection, or minimum pipe distances. Ask the local water authority before installation. Do not assume a familiar solution is acceptable overseas. Regulations can change.
Use a check valve to reduce reverse flow, but inspect it regularly for sediment. Protect outdoor pipes from freezing, heat, vehicle impact, and ultraviolet damage. Add a visible outlet so blocked flow is easier to detect. Test the system with clean water, then observe where the water travels. I have seen installations pass a pump test but still flood because the outlet ended beside the wall. That mistake is easy to miss. Environmental requirements also matter. Avoid sending contaminated water into natural waterways, and arrange safe handling when groundwater carries oil, chemicals, or sediment. Keep installation records, maintenance dates, pipe materials, and local approvals together. Paperwork feels minor until a dispute begins.
Inspecting, Maintaining, and Troubleshooting Sump Pump Drainage Systems
10 Sump Pump Drainage Tips for Global Buyers
Inspecting a sump pump drainage system starts with the pit, not the pump. Remove sediment, leaves, and gravel that could block the intake screen. The float should move freely without touching the pit wall. Test it by slowly adding clean water. The pump should start before the water reaches the inlet pipe. Keep it simple. Check the power rating, voltage, and frequency before installation, especially when buying across borders. A qualified local electrician should confirm compatibility with the building’s electrical system.
Examine the discharge pipe for cracks, loose joints, and sharp bends. Water should flow away from the foundation, not return beside it. In cold regions, protect exposed sections from freezing and maintain a slight slope where possible. A check valve can prevent backflow, but it still needs periodic inspection. Listen for grinding, repeated cycling, or unusual vibration. These signs may indicate debris, a worn bearing, or an undersized drainage route. Do not guess.
Maintenance should include cleaning the pit and testing any backup system several times each year. During heavy rain, observe whether the pump keeps pace or runs continuously. Continuous operation may reflect excessive groundwater, a blocked outlet, or incorrect pump capacity. One practical mistake is testing only during dry weather. That gives false confidence. Keep a dated inspection record, including water level, sound, discharge flow, and visible damage. A local drainage professional can assess soil conditions and recommend adjustments for the site.
10 Sump Pump Drainage Tips for Global Buyers - Inspecting, Maintaining, and Troubleshooting Sump Pump Drainage Systems
| No. | Drainage Topic | Inspection or Maintenance Action | Practical Benchmark | Common Warning Sign | Recommended Response |
|---|---|---|---|---|---|
| 1 | Confirm Pit Size and Position | Check that the pump sits upright in a stable sump pit and that the pit cover allows safe access for inspection. | Many residential sump pits are approximately 18–24 inches (46–61 cm) in diameter, although local designs vary. | The pump tilts, vibrates, or the float switch catches on the pit wall. | Reposition the pump on a level base and keep the float path clear of pipes, cables, and debris. |
| 2 | Inspect the Discharge Pipe | Examine the pipe for cracks, loose joints, sharp bends, ice, blockages, and unsupported sections. | The discharge route should maintain a continuous flow path and should not terminate where water can return to the foundation. | Water backs up, the motor runs longer than usual, or joints leak during pumping. | Clear the obstruction, repair damaged fittings, and secure the pipe to reduce vibration and stress. |
| 3 | Verify the Check Valve | Check the valve direction and listen for abnormal slamming or repeated cycling after the pump stops. | The valve should allow water to move away from the pit and prevent the discharge column from flowing back. | The pump starts again immediately or the pit refills rapidly after shutdown. | Clean or replace a faulty valve and confirm that its flow arrow points away from the sump pit. |
| 4 | Test the Float Switch | With power connected, manually raise the float or add water gradually to confirm that the pump starts and stops without obstruction. | The float should move freely and should not touch the pump, pit wall, discharge pipe, or electrical cable. | The pump does not start, runs continuously, or starts and stops too frequently. | Remove interference, adjust the switch position according to the installation instructions, or replace a defective switch. |
| 5 | Clean the Pump Intake | Disconnect electrical power before removing the pump and remove sediment, gravel, lint, and other debris from the intake screen or base. | The intake should remain visibly open so water can enter without excessive restriction. | The motor hums, flow is weak, or the pump overheats and shuts down. | Clean the intake and pit; do not operate the pump dry unless the operating instructions specifically allow it. |
| 6 | Check the Air-Relief Hole | If the system design includes a small air-relief hole in the discharge pipe, confirm that it is open and free of scale or debris. | Some installations use an approximately 1/8-inch (3 mm) relief hole below the check valve; the exact location must follow the pump instructions. | The pump runs but produces little or no discharge. | Clear the hole carefully and verify that the discharge pipe is not air-locked or blocked. |
| 7 | Measure Pumping Performance | Record the time required to lower the water level and compare future results under similar conditions. | Flow rate decreases as vertical lift, pipe length, fittings, and discharge restrictions increase; use the pump curve for accurate comparison. | The same water level takes noticeably longer to drain than during previous tests. | Inspect the intake, check valve, pipe route, electrical supply, and total discharge head before replacing the pump. |
| 8 | Protect Against Freezing | Inspect exterior discharge sections before winter and ensure the outlet remains open and directed away from the building. | Discharge piping in freezing climates needs suitable slope, insulation, burial depth, or other measures required by local practice. | The motor runs but water cannot exit, or the pipe bulges after freezing weather. | Remove ice safely, repair split pipe, and improve the cold-weather drainage arrangement. |
| 9 | Review Electrical Safety | Inspect the power cord, plug, receptacle, grounding, and residual-current or ground-fault protection required by local electrical rules. | Electrical protection and voltage must match the pump rating and the regulations of the installation country. | The protective device trips, the plug becomes hot, or the pump operates intermittently. | Stop using the system and have a qualified electrician inspect the circuit; never handle energized equipment in standing water. |
| 10 | Prepare Backup Drainage | Evaluate a secondary pump, battery backup, high-water alarm, or emergency power source where flooding risk or power interruptions are significant. | Backup capacity should be selected using expected inflow, required pumping height, outage duration, and local weather conditions. | The water level rises during a power outage or the high-water alarm activates repeatedly. | Test the backup system at least seasonally and replace batteries according to their service-life and safety instructions. |
Safety note: Always disconnect power before servicing a sump pump. Installation, electrical work, and discharge routing should comply with local building, plumbing, and electrical requirements.
Related Posts
-
Top 10 Basement Sump Pump System Benefits for Homeowners
-

2026 How to Choose the Right Drainage Pump for Your Needs?
-
How to Choose a Sump Pump with Battery Backup for Your Home?
-
How to Choose the Right Sump Pump for Effective Drainage Solutions?
-
Top 5 Sump Pumps with Battery Backup for Ultimate Protection?
-
What is a Sump Pump System and How Does it Work?